
Importance of Packing Camera Gear Properly
Traveling with camera equipment can be both exciting and nerve-wracking, especially when you’re carrying expensive lenses, bodies, and accessories. The risk of damaging these delicate items during transit is significant without proper packing. Even minor impacts or exposure to moisture can lead to costly repairs or irreparable damage, cutting short your ability to capture those once-in-a-lifetime shots.
Beyond protection, carefully organizing your gear ensures quick accessibility. When your camera and accessories are packed efficiently, you’re always ready to shoot on the go—no fumbling through loose cables or tangled straps. This readiness is crucial in travel photography, where moments are fleeting, and the best shots often come unexpectedly. A well-packed camera bag streamlines your workflow and keeps everything at your fingertips.
This article explores the essentials of packing camera gear for travel, offering practical tips to keep your equipment safe, organized, and TSA-compliant. We’ll cover smart packing techniques, recommended cases and organizers, and advice on navigating airport security while protecting your gear. Whether you’re a seasoned photographer or an enthusiastic traveler, these insights will help you travel lighter and shoot smarter.
By mastering how to pack your camera gear properly, you safeguard your investment, improve your travel efficiency, and enhance your overall shooting experience. For more travel tips and affordable flight deals to your next destination, visit CheapFareGuru.
Essential Camera Gear Items Overview
When preparing for a photography-focused trip, packing the right camera gear is crucial for capturing stunning images without overburdening yourself. Whether you’re a casual traveler or a professional photographer, knowing what gear to bring, and in what quantities, can streamline your experience and ensure you’re ready for diverse shooting scenarios.
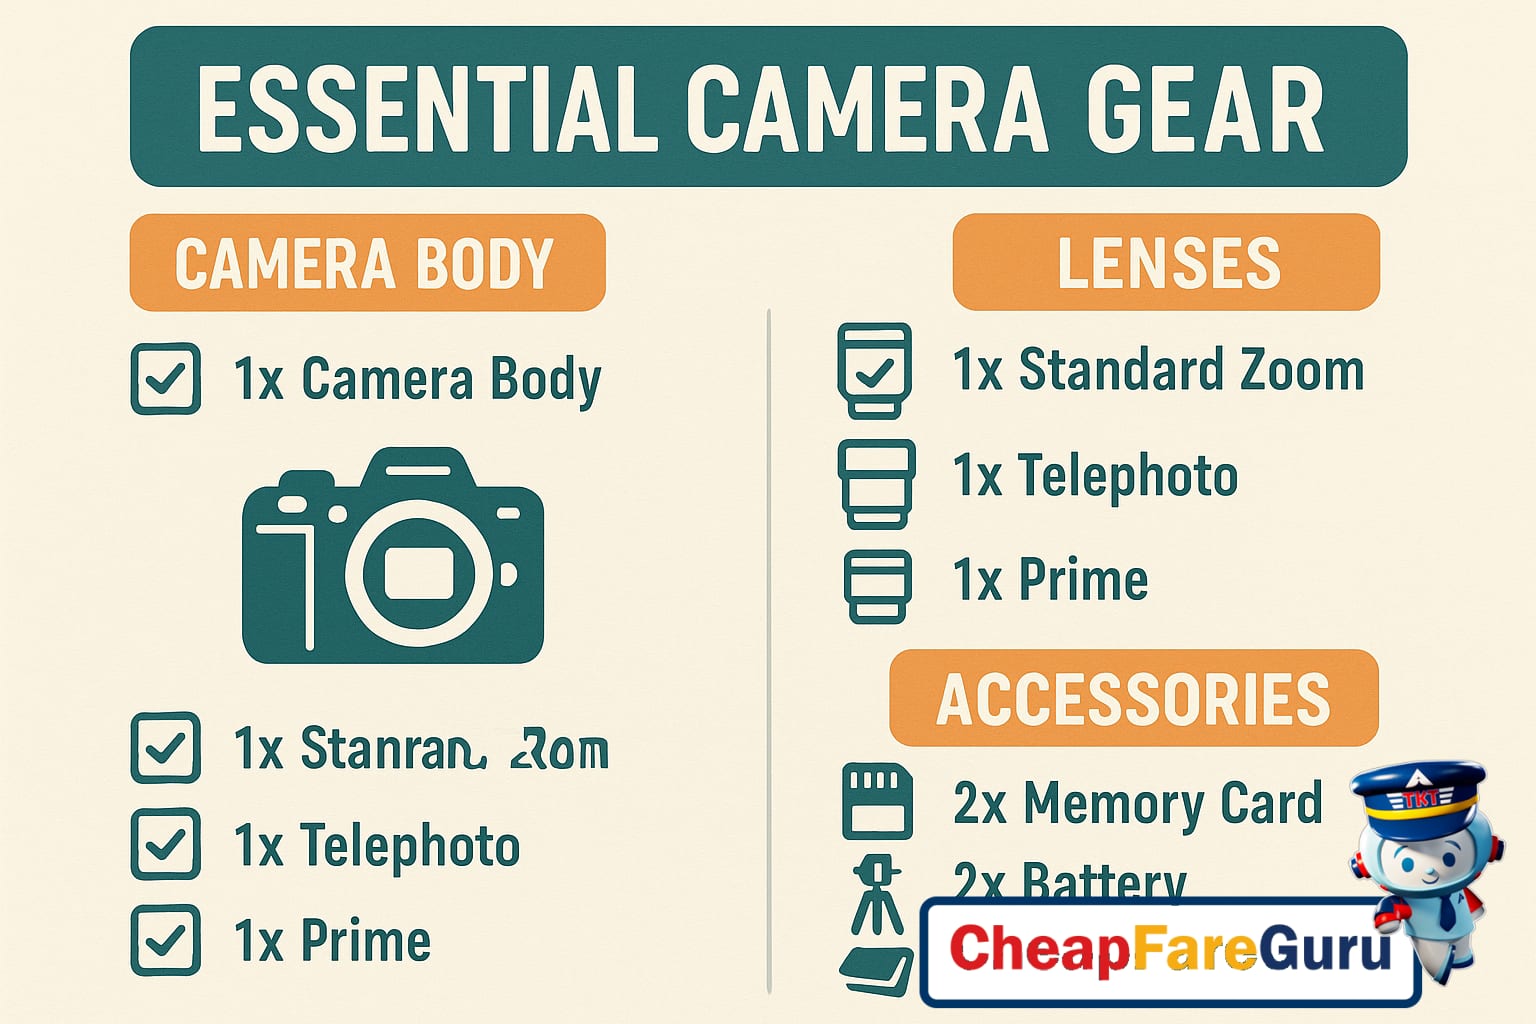
Here’s a list of essential camera gear items every traveler should consider:
- Camera Bodies: One reliable camera body is usually sufficient for casual travel. Professionals might carry a second body as a backup or for using different lens types simultaneously.
- Lenses: A versatile zoom lens (such as 24-70mm) covers most scenarios, while a prime lens (like 50mm or 35mm) offers sharper images and better low-light performance. For landscape or wildlife photography, wider or telephoto lenses are advisable. Typically, two to three lenses strike the right balance for most trips.
- Batteries: At least two fully charged batteries per camera body are recommended. This prevents missed shots, especially when outlets are scarce during travel.
- Memory Cards: Bring multiple memory cards to avoid storage issues. Four to six cards, depending on the size and resolution, should cover a week-long trip. Choose high-speed cards for efficient data writing and transfers.
- Chargers and Cables: A charger for each battery and spare USB cables are essential. Consider compact, multi-port chargers and international adapters if traveling abroad.
- Cleaning Kits: Include lens cleaning cloths, microfiber towels, a blower, and cleaning solution to maintain lens clarity on the go.
Adjust quantities based on your travel type:
- Casual Travelers: Pack minimally to keep luggage light. One camera, one versatile lens, two batteries, and plenty of memory cards will cover most needs.
- Professional Photographers: Expect to carry a broader range of gear, including multiple camera bodies, several lenses for different compositions, a robust battery supply, and advanced accessories like tripods or filters.
Packing the right balance of gear means being prepared without carrying unnecessary weight. Focus on your shooting style and travel itinerary to determine which items are essential. For savings on travel bookings and expert tips, trust CheapFareGuru to streamline your journey from start to finish.
Choosing the Right Camera Bag
Selecting the perfect camera bag is essential for protecting your gear while matching your travel style and organizational needs. Whether you’re a weekend photographer or a frequent traveler, understanding the different types of bags and their features helps you avoid unnecessary bulk or damage.
Compare Backpack, Shoulder Bag, and Hard Case
Backpacks are popular for their ergonomic support and ample space. They distribute weight evenly, making them ideal for those carrying heavy or multiple camera bodies and lenses. Many backpacks feature customizable padded compartments to keep equipment secure. However, accessing gear quickly can sometimes be tricky, especially if the bag is fully packed.
Shoulder bags offer easier access to your camera, perfect for casual shooters or urban explorers. They tend to be more compact and stylish but may cause strain when carrying heavy equipment for extended periods. Shoulder bags are best suited for lighter loads and short trips where quick reach is a priority.
Hard cases provide the highest level of protection, usually offering waterproof, crushproof, and dustproof qualities. These cases are excellent for air travel or extreme environments; however, they can be bulky and heavy. Hard cases often have foam inserts that you cut to fit your gear precisely, ensuring maximum security.
Prioritize Protection and Features
Look for bags with padded compartments to cushion your camera and lenses from shocks or drops. Weather resistance is critical if you shoot outdoors—bags with water-repellent fabrics or included rain covers add valuable protection.
For air travelers, consider a TSA-friendly design. These bags open completely flat for easy inspection without unpacking, saving time during security checks and reducing the risk of gear damage.
Additional features such as secure zipper pulls, external tripod mounts, and multiple pockets for batteries, memory cards, and personal items enhance usability and convenience on the go.
Match Bag Size to Your Gear Volume
A common mistake is choosing a bag too large or too small for your equipment. An oversized bag encourages overpacking, making you carry unnecessary weight, while an undersized bag can cramp your gear and increase the chance of damage.
Assess your camera bodies, lenses, and accessories before buying. Choose a bag that fits your current setup with some room for occasional additions but not so large that you’ll be tempted to fill it unnecessarily.
For those who travel light, a compact shoulder bag or small backpack might be perfect. Professionals with multiple lenses and accessories will benefit from a larger, well-organized backpack or a custom foam-packed hard case.
Step-by-Step Camera Gear Packing Checklist
Packing your camera gear efficiently is essential to protect your equipment and ensure you have everything you need for capturing your travel memories. Use this comprehensive checklist from CheapFareGuru to organize your gear into key categories and follow smart packing strategies.
Cameras
- Main camera body: 1 (choose the primary camera fit for your trip)
- Backup camera body: 1 (if possible, bring a secondary camera for peace of mind)
- Action or compact camera: Optional, for versatility or tough environments
- Protective cases: Use padded, shockproof cases to prevent damage during transit
Lenses
- Wide-angle lens: 1, ideal for landscapes and architecture
- Standard zoom lens: 1, a versatile everyday option
- Telephoto lens: 1, useful for wildlife or distant subjects
- Prime lens: Optional, often for portraits or low-light shooting
- Lens caps and filters: Bring at least one set per lens to protect glass and manage lighting
- Lens cleaning kit: Essential for keeping lenses spotless on the go
Power and Storage
- Batteries: Pack a minimum of 2-3 fully charged batteries per camera
- Battery chargers: Bring chargers compatible with all your batteries; consider a portable power bank
- Memory cards: Have 3-5 high-capacity cards (SD, CF, or others depending on your gear)
- Card reader: Handy for quickly transferring photos to your laptop or portable storage
- External hard drive or SSD: For additional backup if space allows
Accessories
- Tripod or monopod: One compact tripod for steady shots and low-light conditions
- Camera strap or harness: To comfortably carry cameras and reduce risk of drops
- Remote shutter release: Optional, for avoiding camera shake during long exposures
- Flash and diffusers: Optional based on shooting style and environment
- Rain cover or weatherproof bag: Protects gear during unexpected weather
- Cleaning tools: Microfiber cloths, air blower, and brush to maintain equipment
Personal Items
- Comfortable camera bag or backpack: Choose one with padded compartments and customizable dividers for gear organization
- Travel insurance documents: Verify coverage for photography equipment loss or damage
- Notepad and pen: For jotting down shooting locations or settings
- Protective gloves: Optional, for cold climates or rugged shooting spots
Packing Order and Placement Tips
Start by placing heavier items like your camera bodies and lenses at the center or bottom of your bag, surrounded by padding for shock absorption. Store fragile accessories separately in smaller compartments or padded pouches. Keep batteries, memory cards, and chargers in easy-to-access pockets for quick swapping during shoots. Use ziplock bags for extra moisture protection, especially for lenses and electronic components.
Always pack lens caps on securely and double-check that all protective cases close firmly before finalizing your packing. Consider packing a small soft cloth between lenses to prevent scratches when stored together.
This categorized approach from CheapFareGuru will help you prepare your camera gear systematically, keeping your equipment safe, accessible, and ready for capturing those perfect travel moments.
TSA Rules and Travel Tips for Camera Equipment
Traveling with camera gear requires special attention when passing through airport security. The Transportation Security Administration (TSA) has clear guidelines to ensure safety while minimizing hassle for travelers carrying valuable electronics. Understanding these rules can save you from unnecessary delays and protect your equipment during your journey.
The TSA permits camera equipment in both carry-on and checked luggage, but with specific restrictions on batteries and accessories. Lithium-ion batteries, commonly used in cameras and drones, must always be carried in carry-on bags—not checked luggage—due to fire safety concerns. Spare batteries should be individually protected to prevent short circuits, such as by placing each battery in its original packaging or covering the terminals with tape. Chargers, cords, and memory cards are allowed in either carry-on or checked baggage, but keeping them accessible in your carry-on streamlines the security screening process.
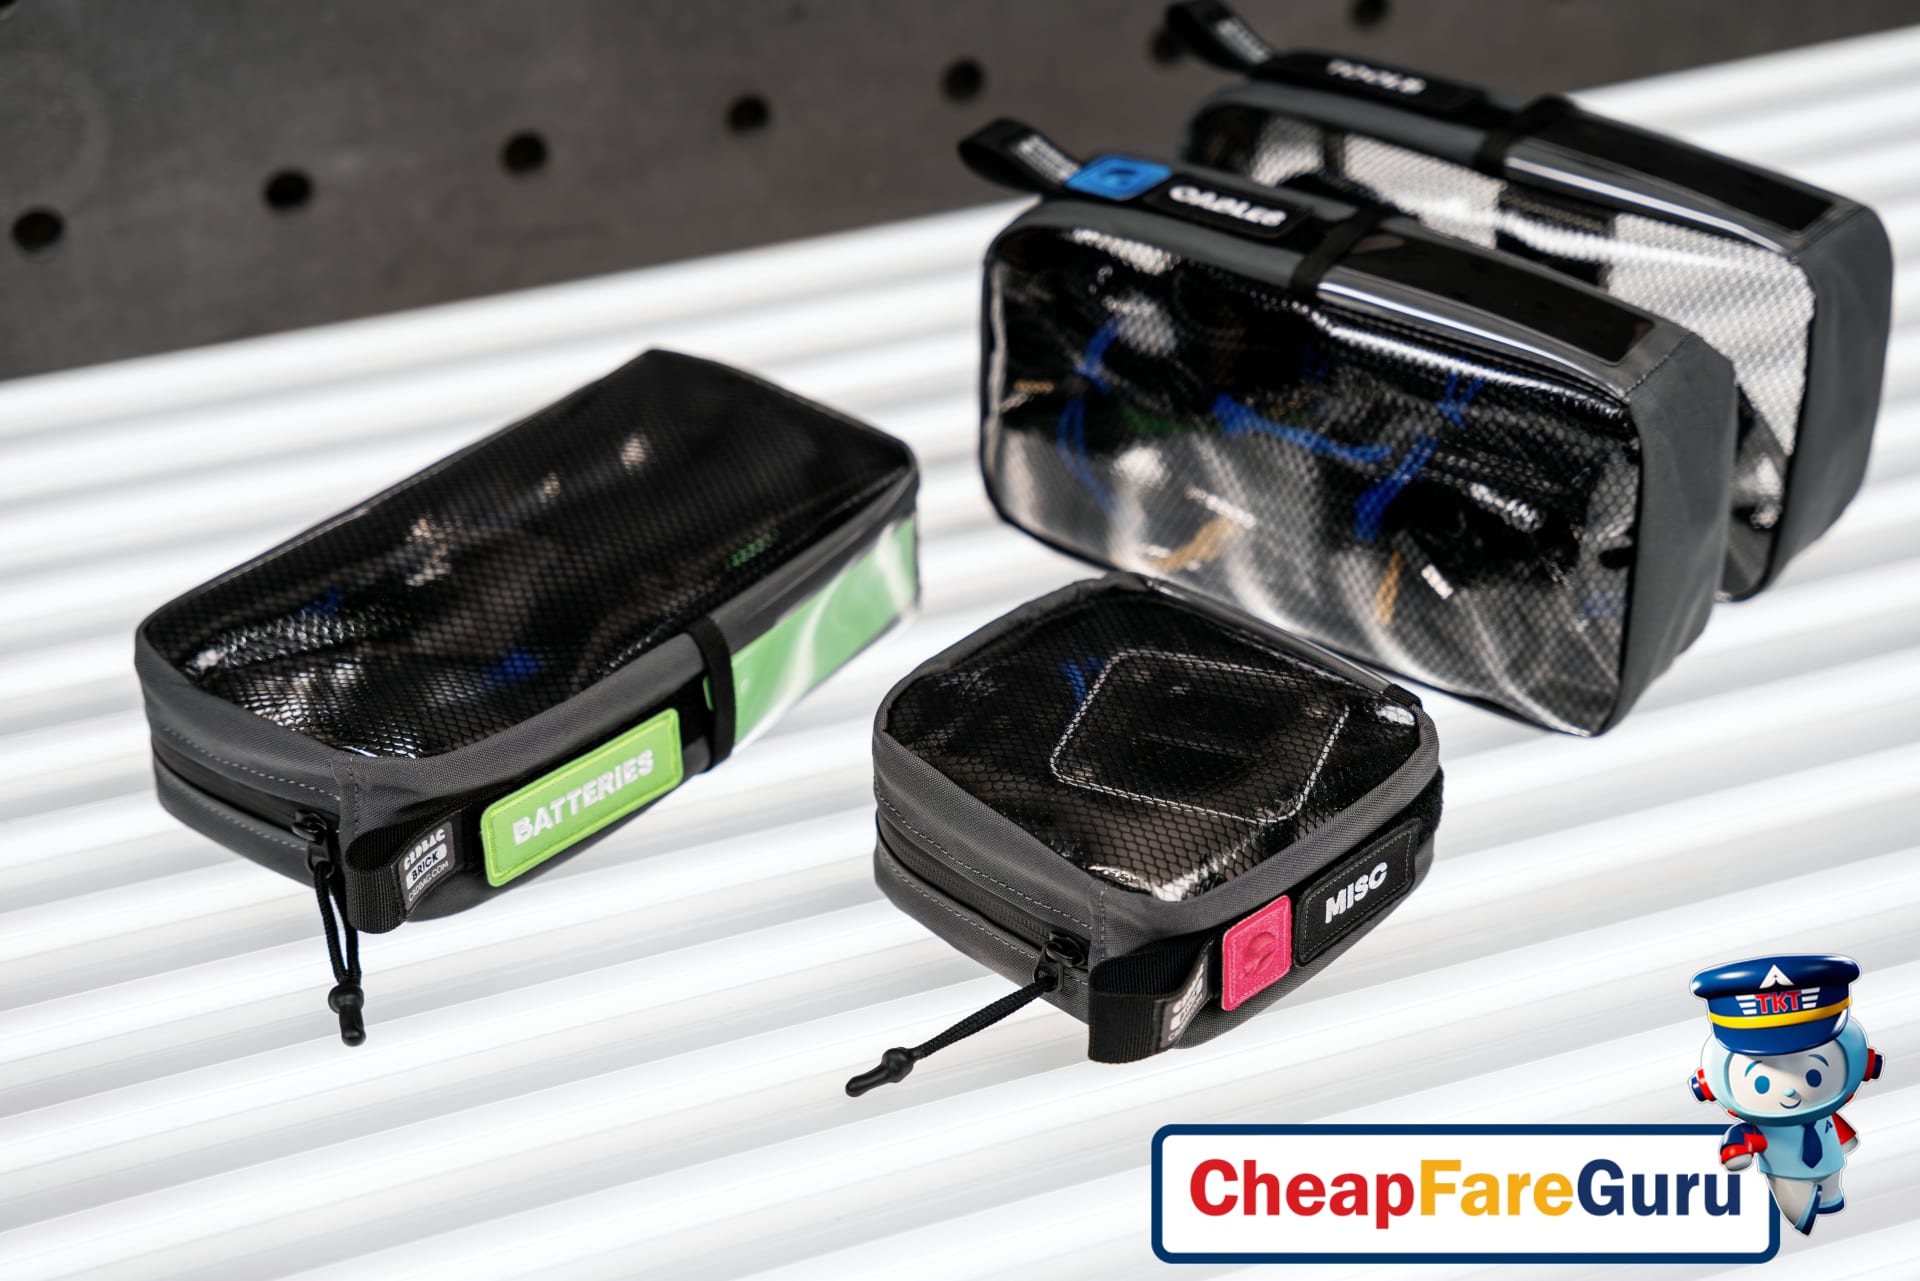
Proper organization is key. Pack cords and chargers neatly in clear, separate pouches or small bags to avoid tangled messes that cause inspection delays. Place your camera body and lenses in padded compartments within your carry-on to protect them from impact and to make removal easier during security checks. Removing your camera from its case and placing it in a bin for X-ray screening may be required, especially for larger or professional models.
Documenting your gear before traveling is a wise precaution. Taking photos or keeping a detailed inventory of serial numbers and model information can be invaluable in case of loss, theft, or damage claims. If carrying high-value equipment, consider declaring it at check-in or on your customs forms, especially for international flights. This declaration helps avoid misunderstandings regarding ownership and potential duties when returning home.
Space-Saving and Weight Distribution Techniques
Efficient packing is essential for any traveler looking to save space, reduce strain, and keep gear secure. Applying smart techniques like rolling, layering, and compartmentalizing can dramatically maximize your luggage capacity while ensuring your belongings stay organized and protected. These strategies also support optimal weight distribution, which makes carrying your bags more comfortable and prevents awkward shifting during transit.
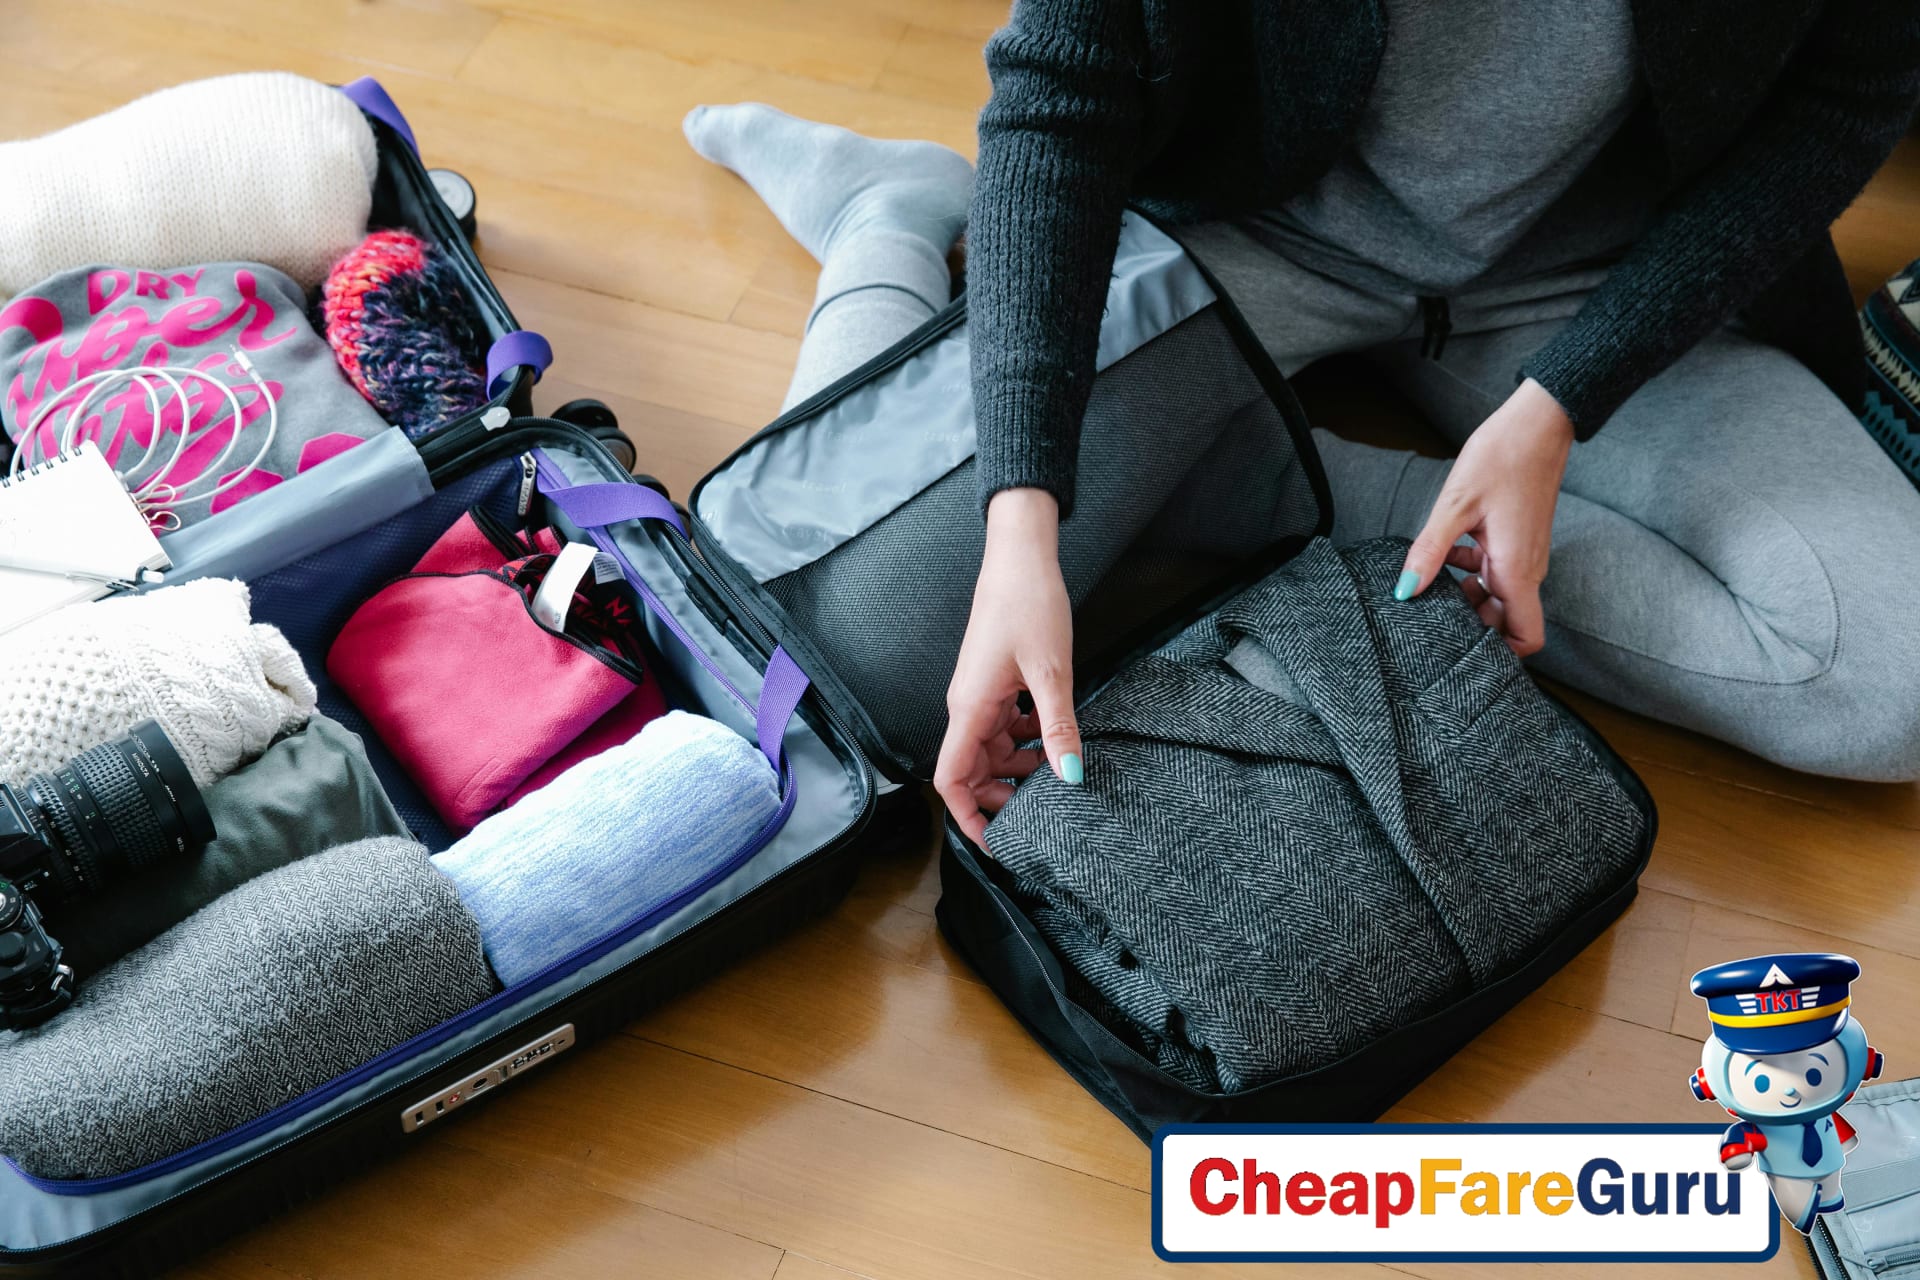
One of the simplest ways to save space is by rolling your clothes instead of folding them. Rolling compresses fabrics tightly, allowing you to fit more into smaller spaces and reducing wrinkles. After rolling, strategically layering heavier items on the bottom of your suitcase or backpack sets a solid foundation. Layer lighter garments or delicate items on top to minimize crushing. This layering approach not only keeps your gear neat but balances the load so the bag doesn’t become lopsided.
Utilizing compartments and packing cubes is another key to maintaining space efficiency. Separate categories of items into individual sections—such as underwear, electronics, and toiletries—to avoid a jumbled mess. This compartmentalization makes it easier to access items without unpacking everything. It also aids weight distribution since small, dense packs can be positioned around bulkier gear for stability.
Weight distribution plays a critical role in comfort and safety when transporting your luggage. Avoid overloading one side; instead, aim for an even spread of weight to reduce muscle strain and maintain your balance. For backpackers, this means placing heavier gear like shoes or electronics closest to your back and centered. For suitcases, heavier items should sit towards the wheels to improve maneuverability and prevent tipping.
To cushion heavier items and stabilize your load, surround them with lighter, softer items such as t-shirts, scarves, or packing cubes filled with socks. This padding technique absorbs shocks and prevents your belongings from shifting or breaking. It also helps distribute pressure evenly inside your bag, safeguarding fragile gear like cameras or souvenirs.
In summary, integrating these space-saving and weight distribution techniques can transform your travel experience. Rolling clothes, layering items by weight, using compartments efficiently, and strategically packing heavier gear centered with lighter items around it all contribute to more secure, manageable luggage. For even more travel tips and affordable flight options, visit CheapFareGuru and start planning smarter trips today.
Recommended Camera Brands and Travel Accessories
Choosing the right camera gear can elevate your travel photography, capturing memories with clarity and creativity. Whether you’re just starting out, an enthusiast, or a seasoned professional, selecting equipment suited to your budget and travel style is crucial. Here’s a breakdown of trusted camera brands and essential accessories across budget levels to help you make informed choices for your adventures.
Entry-Level Camera Brands and Gear
For travelers on a budget or beginners stepping into photography, entry-level cameras combine ease of use with respectable image quality. Reliable brands to consider include:
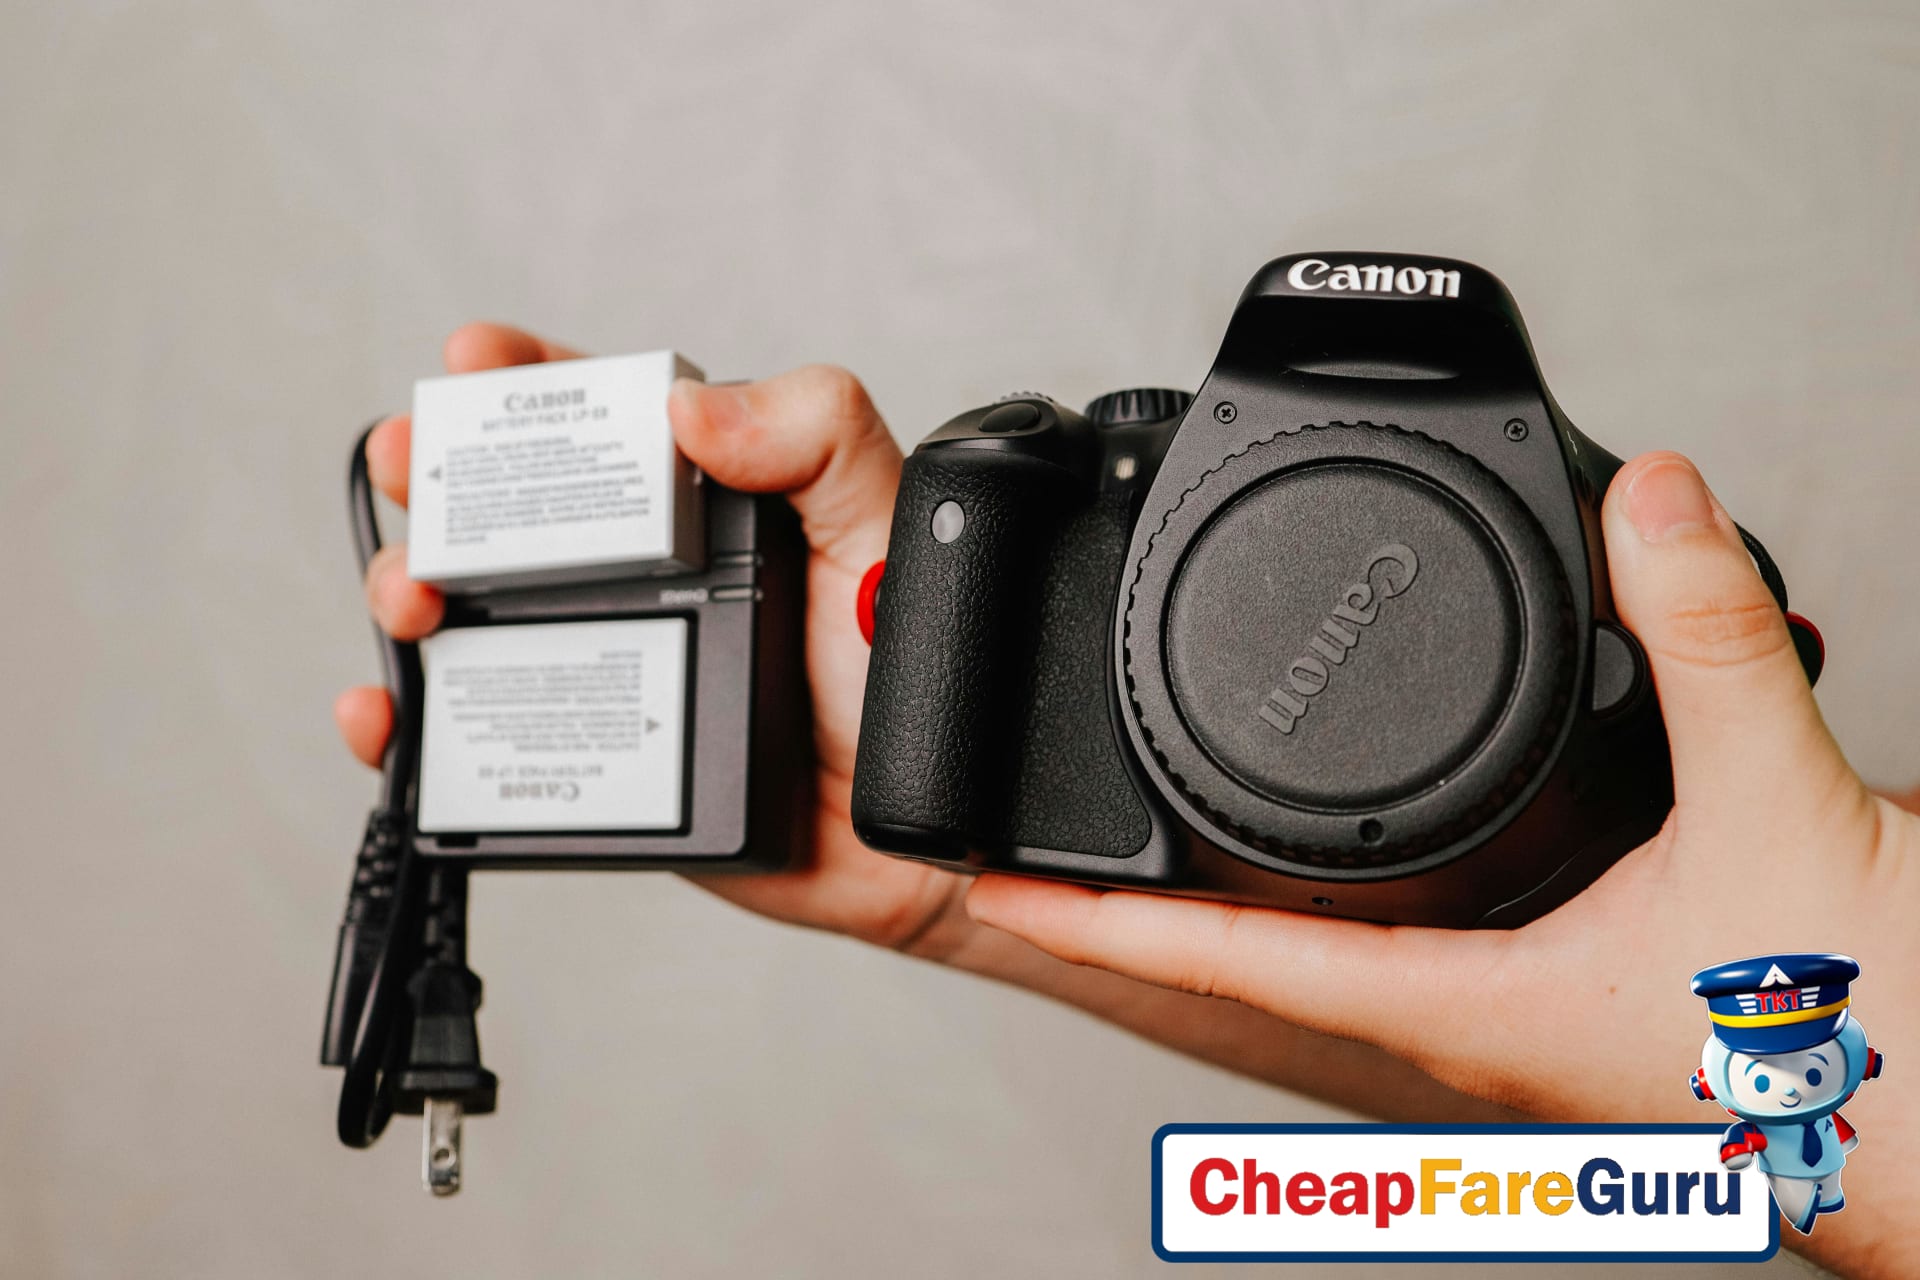
- Canon EOS Rebel Series: Affordable DSLRs with intuitive controls, perfect for learning manual settings.
- Nikon D3500: Known for excellent battery life and user-friendly features, ideal for travel novices.
- Sony Alpha a6000: A compact mirrorless option offering sharp images and fast autofocus at a budget-friendly price.
Lenses: Kit lenses (18-55mm) usually suffice for travel, providing versatile focal lengths for landscapes and portraits. Pairing with a lightweight tripod from brands like Manfrotto’s compact line can stabilize shots without adding bulk.
Midrange Camera Options for Serious Travelers
For those wishing to step up their game, midrange cameras offer enhanced features such as higher resolution, better low-light performance, and advanced autofocus systems.
- Fujifilm X-T30: A mirrorless camera with retro design and excellent color reproduction, popular among travel photographers.
- Canon EOS 90D: A versatile DSLR with fast burst shooting and a robust build ideal for dynamic travel environments.
- Sony Alpha a6400: Boasts rapid autofocus and 4K video recording, suitable for photo and video content creation.
Lens Recommendations: Consider prime lenses such as 35mm or 50mm for sharp portraits and street photography, or a zoom lens like 18-135mm for all-around versatility. Midrange tripods from brands like Gitzo offer sturdy support while still being transport-friendly.
Professional Camera Equipment for Enthusiasts
If you’re serious about travel photography and seek impeccable image quality, professional-grade equipment is worth the investment. These brands are industry leaders:
- Canon EOS R5: A full-frame mirrorless powerhouse with unbeatable resolution and advanced stabilization.
- Nikon Z7 II: High-resolution sensor paired with a durable body, great for detailed landscape shots.
- Sony Alpha a7R IV: Top-tier mirrorless camera delivering outstanding dynamic range and autofocus speed.
Lenses: Professional zoom lenses like 24-70mm f/2.8 or prime lenses such as 85mm f/1.4 offer versatility and superior sharpness. For support, carbon fiber tripods from Really Right Stuff balance weight and durability.
Essential Travel Photography Accessories
Beyond the camera and lenses, various accessories can make a significant difference on the road:
- Weather Covers: Protect your camera from rain, dust, and sand—especially vital in unpredictable environments.
- Portable Chargers and Extra Batteries: Long days exploring require reliable power sources to keep shooting.
- Lens Cleaning Kits: Dust and fingerprints degrade photo quality; carry microfiber cloths and cleaning solution for on-the-go maintenance.
- Memory Cards with High Speed: Investing in fast SD or CFexpress cards ensures smooth photo capture and video recording.
- Compact Tripods and GorillaPods: Flexible tripods are perfect for uneven surfaces, enabling creative angles without adding bulk.
By carefully selecting camera brands and accessories matched to your budget and travel style, you’ll be well-prepared to capture stunning travel moments. Quality gear combined with smart accessories ensures you won’t miss a shot, no matter where your journey takes you.
Common Mistakes to Avoid When Packing Gear
Packing camera gear for travel requires careful planning to protect your equipment and ensure a smooth journey. Many travelers make avoidable mistakes that risk damaging their gear, losing essential items, or encountering issues at airport security. Being aware of these common errors can improve your travel experience and safeguard your investment.
One frequent mistake is overpacking camera equipment. Bringing too many lenses, accessories, or bulky cases not only increases your luggage weight but also complicates organization. Overpacking raises the chance of damage as heavy bags may be handled roughly. It also limits space for other important travel essentials. Instead, select versatile gear that meets your shooting needs without excess.
Insufficient padding is another critical error. Camera gear is delicate, and inadequate cushioning can lead to scratches, dents, or broken components during transit. Avoid packing items loosely in your suitcase or backpack. Opt for padded camera bags or use bubble wrap and soft cloths around your equipment to absorb shocks. Well-padded gear offers better protection on bumpy rides or when bags are tossed around.
Many travelers overlook batteries and power storage guidelines, which can cause TSA delays or confiscations. Loose batteries, especially lithium-ion ones, can pose safety risks if not properly stored. Always keep batteries in their designated compartments or carry them in battery cases to prevent short-circuiting. Check airline regulations on the number and type of batteries allowed in carry-on luggage to avoid complications.
Forgetting backup gear is one more common pitfall. Malfunctions or losses can happen unexpectedly, leaving you stranded without essential tools. Carry extra memory cards, spare batteries, and even duplicate lenses if possible. A few backup items don’t add much bulk but provide security and flexibility during your trip.
Other practical strategies to prevent packing mistakes include:
- Organizing gear with customizable compartments or inserts to avoid shifting.
- Labeling camera bags clearly to minimize mix-ups during baggage screening.
- Carrying valuable or fragile gear in your carry-on instead of checked luggage.
- Knowing your airline’s baggage size and weight rules to prevent overage fees.
Being mindful about how you pack your camera gear ensures it arrives in top condition and makes your travels less stressful. Follow these tips from CheapFareGuru to protect your investment and keep your creative workflow uninterrupted.
Camera Gear Packing FAQ
Packing camera gear for flights can be tricky, especially when balancing protection, TSA rules, and luggage limitations. Here are answers to frequent questions travelers have to ensure your equipment stays safe and compliant while you capture every moment.
Pack Camera Batteries Safely for Flights
Camera batteries, especially lithium-ion types, must be packed in carry-on luggage to comply with TSA regulations. They should be kept in their original packaging or insulated terminals with tape to prevent short circuits. Carry just enough batteries for your trip to avoid extra scrutiny, and never check them in your luggage since they pose fire risks.
Choose Lenses Based on Trip Length and Purpose
For a one-week trip, bringing two to three lenses usually strikes the right balance between versatility and weight. A standard zoom lens covers wide to mid-range shots, a prime lens offers sharp detail for portraits, and a telephoto lens handles distant subjects. Overpacking lenses increases baggage weight and risk—prioritize quality over quantity.
When to Choose Carry-On or Checked Luggage
Camera gear is best carried in a dedicated, cushioned carry-on bag to protect against rough handling. Checked bags expose delicate equipment to bumps and potential theft. If your gear is bulky or includes a tripod, consider carrying a separate camera backpack that meets airline size limits. Always keep chargers, memory cards, and spare batteries in your carry-on for easy access.
Importance of TSA Compliance for Camera Equipment
Being TSA-compliant speeds up security checks and prevents damage or confiscation. Clearly separating electronics for screening and knowing which items require declaration helps avoid delays. Carrying acceptable bags and battery storage keeps your gear safe and ensures hassle-free boarding.
Bring Drones Through Airport Security
Yes, you can bring drone cameras through security, but they must follow TSA rules on batteries and carry-on gear. Remove batteries and pack them safely as with camera batteries. Some airlines may have extra restrictions on drone batteries or in-flight usage, so check policies ahead. Always carry your drone onboard rather than checking it in.
Distribute Weight to Protect Gear When Flying
Distribute weight evenly within your camera bag to reduce pressure on delicate lenses and the camera body. Use padded dividers and place heavier items at the bag’s base. Avoid overstuffing bags to prevent damage during handling. For overall baggage, balance camera gear with clothing or soft items that add cushioning.
Space-Saving Tips for Limited Luggage Capacity
- Use padded packing cubes to organize and compress small items like cables and batteries.
- Opt for versatile lenses that cover multiple focal lengths to reduce gear count.
- Wear bulky camera straps or accessories instead of packing them.
- Consider digital backups by transferring photos daily to reduce storage gear.
- Use protective wraps like microfiber cloths or bubble wrap instead of bulky cases.
Final Checklist and Packing Reminder
Organizing and packing your camera gear properly is essential for a smooth and enjoyable trip. Ensuring your equipment is TSA-compliant and securely packed helps prevent damage and avoids delays at security checkpoints. By keeping your gear organized and using practical packing techniques, you can focus on what matters most—capturing memorable moments without worry.
Here’s a concise final checklist to help you prepare your camera gear efficiently before heading out:
- Essentials: Camera body, lenses, extra batteries, memory cards, charger, lens cleaning kit, and protective cases.
- TSA Tips: Pack batteries in carry-on bags only; remove electronics at security screening if required; use clear, zippered bags for cables and accessories.
- Packing Techniques: Use padded inserts or cases to protect fragile gear; place heavier items at the bottom of your bag; avoid overpacking to allow easy access and reduce risk of damage.
- Labeling: Clearly label your camera bag and accessories with your contact information.
- Backup Plan: Consider cloud storage or transferring photos regularly to a separate device to avoid data loss.
Planning your trip with well-packed camera gear is just one part of a smooth travel experience. For affordable flights, hotels, and travel packages, visit CheapFareGuru. Their deal-focused platform offers real-time fare searches and discounted options, plus 24/7 customer support to assist you through every step of booking. Travel smarter and save more by exploring their user-friendly tools and expert travel advice designed to make your journey hassle-free.